If your goal is to make 2022 your year, start by rethinking your grip.
Stephen Denton
The age-old advice of gripping your clubs so that the Vs created by your thumbs and forefingers point toward your rear shoulder doesn’t cut it anymore. Not even close. Research on human anatomy and efficient movement proves that there’s no universal “best way” to set your hands on the handle. Every player’s body and range of motion varies, often wildly. If you don’t consider these differences when taking your grip, you’ll be fighting yourself and risking injury the whole way — and hitting slices and hooks without ever knowing why.
Here’s the smart way to set your hands to max out your natural potential and almost guarantee a more consistent ballflight. Keep reading below to get started.
1. Start with your lead hand
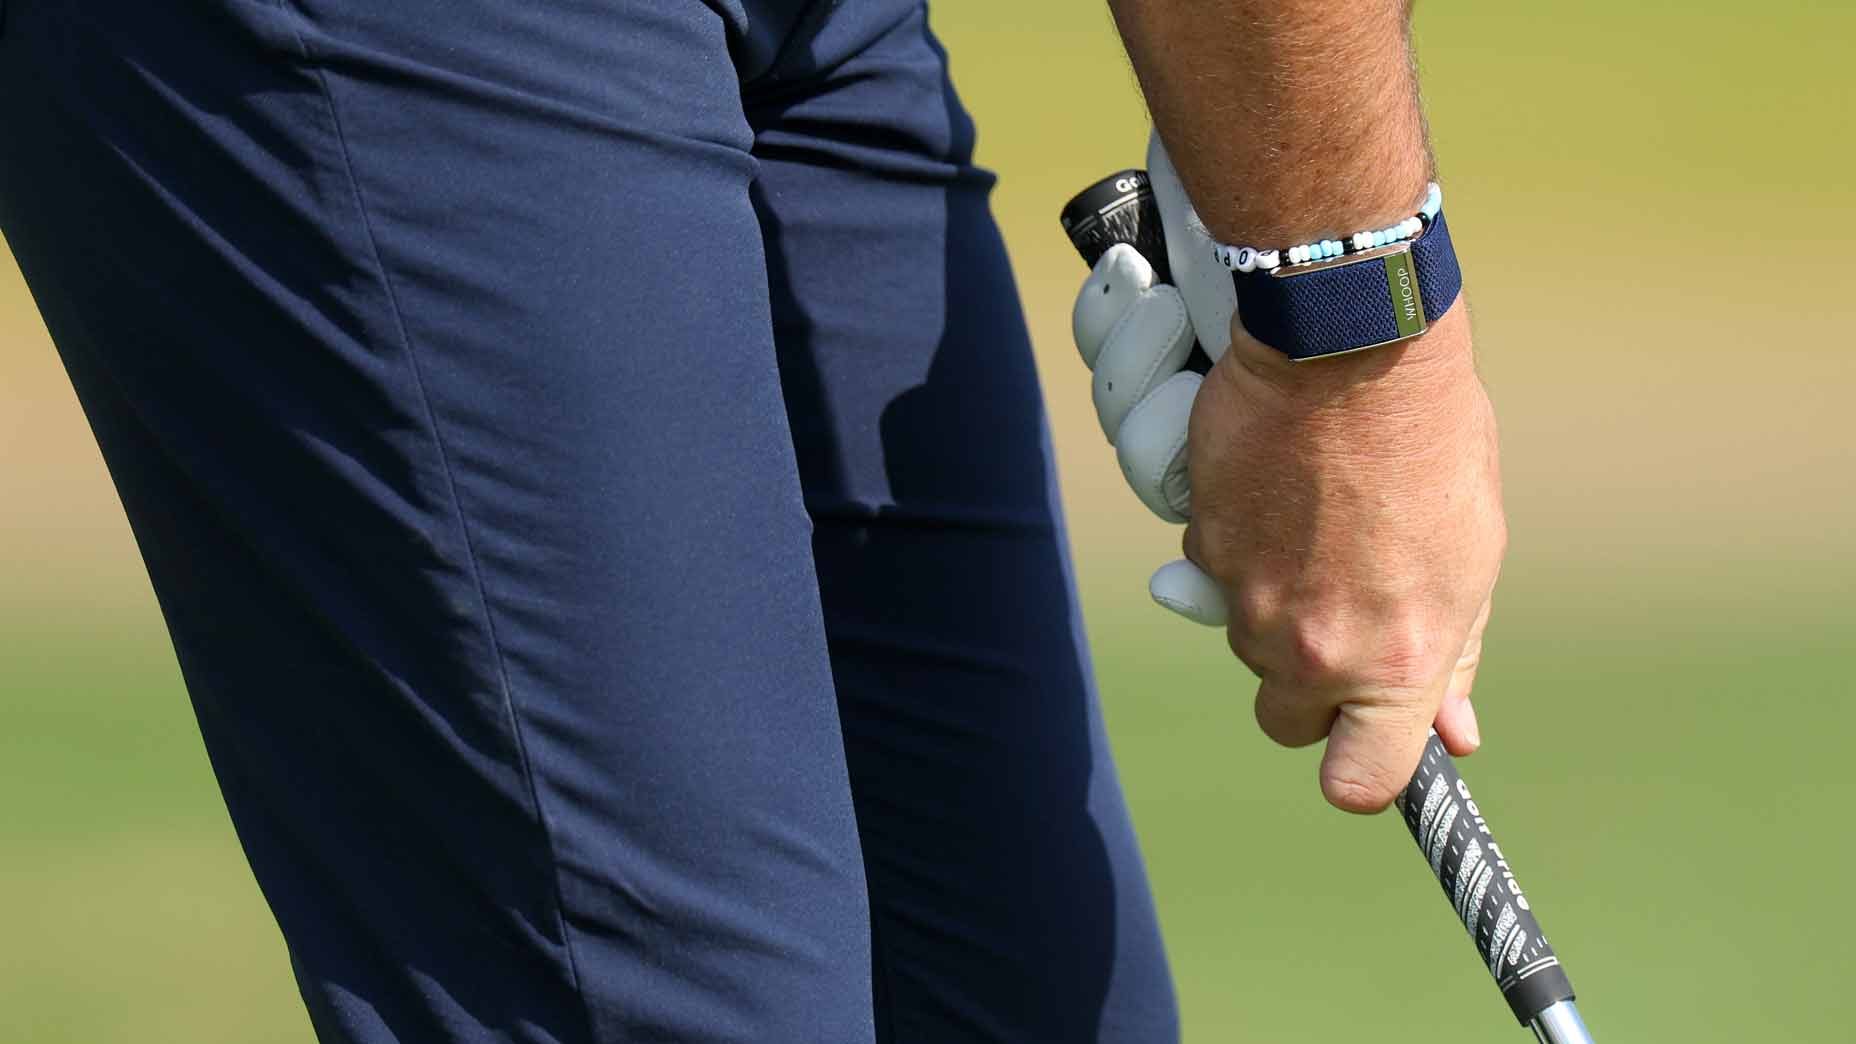
Pointing both Vs at your trail shoulder assumes that we all move in the same way. We don’t. Every player has his or her “natural motion.” A good grip accentuates it while a poor one limits it, and a good grip starts with placing your lead hand on the handle in its most natural setting. To find it, stand erect with your arms dangling freely at your sides. No ball, no golf posture. Now, grip a club. That’s it. You’re now in position to start and finish your swing with zero need for manipulation.
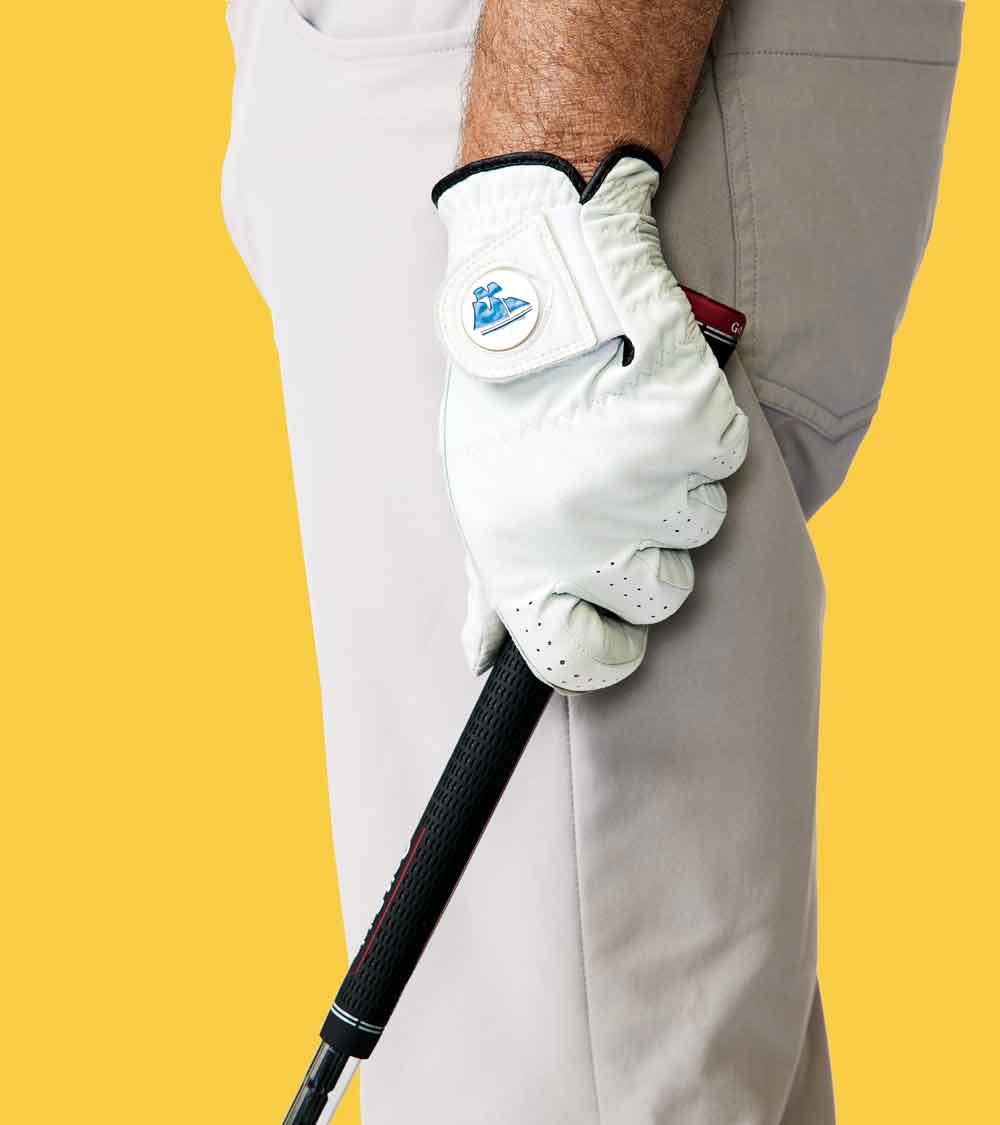
Do this: Let your lead arm hang softly at your side, then grip the club. This is your most natural lead-hand position. If you’re a slicer of the ball, then you’ve been getting this wrong the whole time.
Stephen Denton
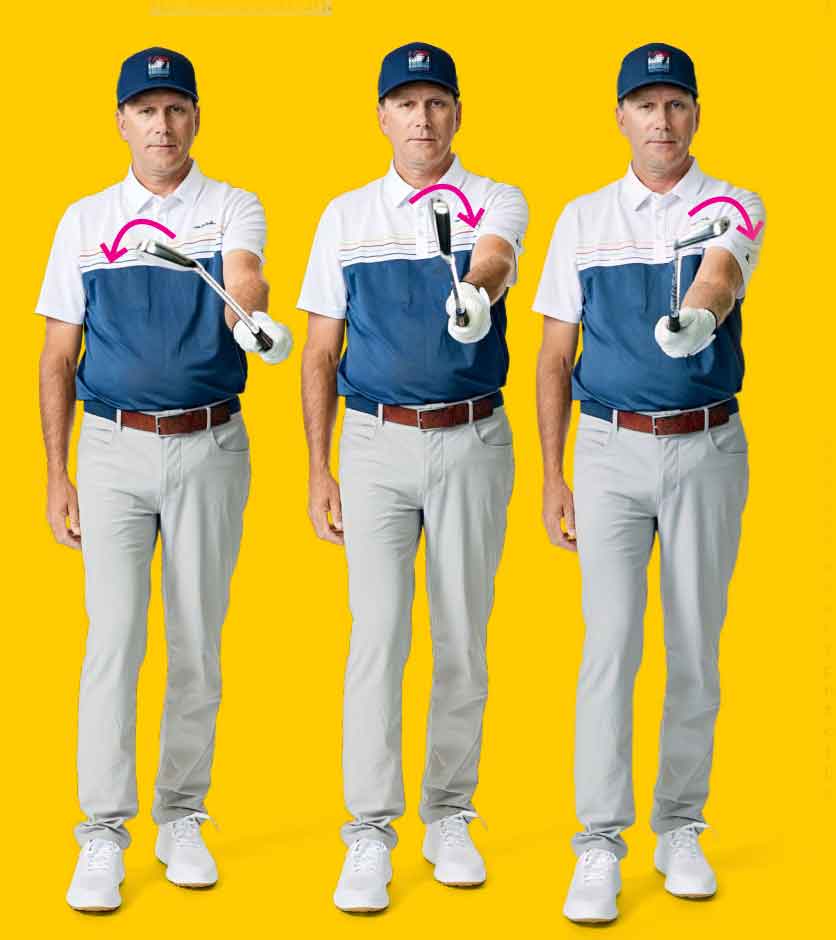
Then this: With your new lead-hand hold, point the club out in front of you, then begin rotating the handle back and forth, as if turning a doorknob. You should immediately recognize more comfort and range of motion. For some, the ideal lead-hand position will be more “on top” of the handle.
Stephen Denton
2. Do some fine-tuning
The exercise at above gets you close to your ideal lead-hand hold, but it may not be perfect (which is what you want). The next step is to double-check that your lead-hand grip matches up with your lead-hip mobility. When these sync, it’s magic. When they don’t, you can expect more of the same inconsistency. Place your trail hand on the handle, hold the club in your address posture, then get into a “dynamic impact” position, with your weight on your front side, hands forward and your hips as open as possible. Now, check your results (see below).
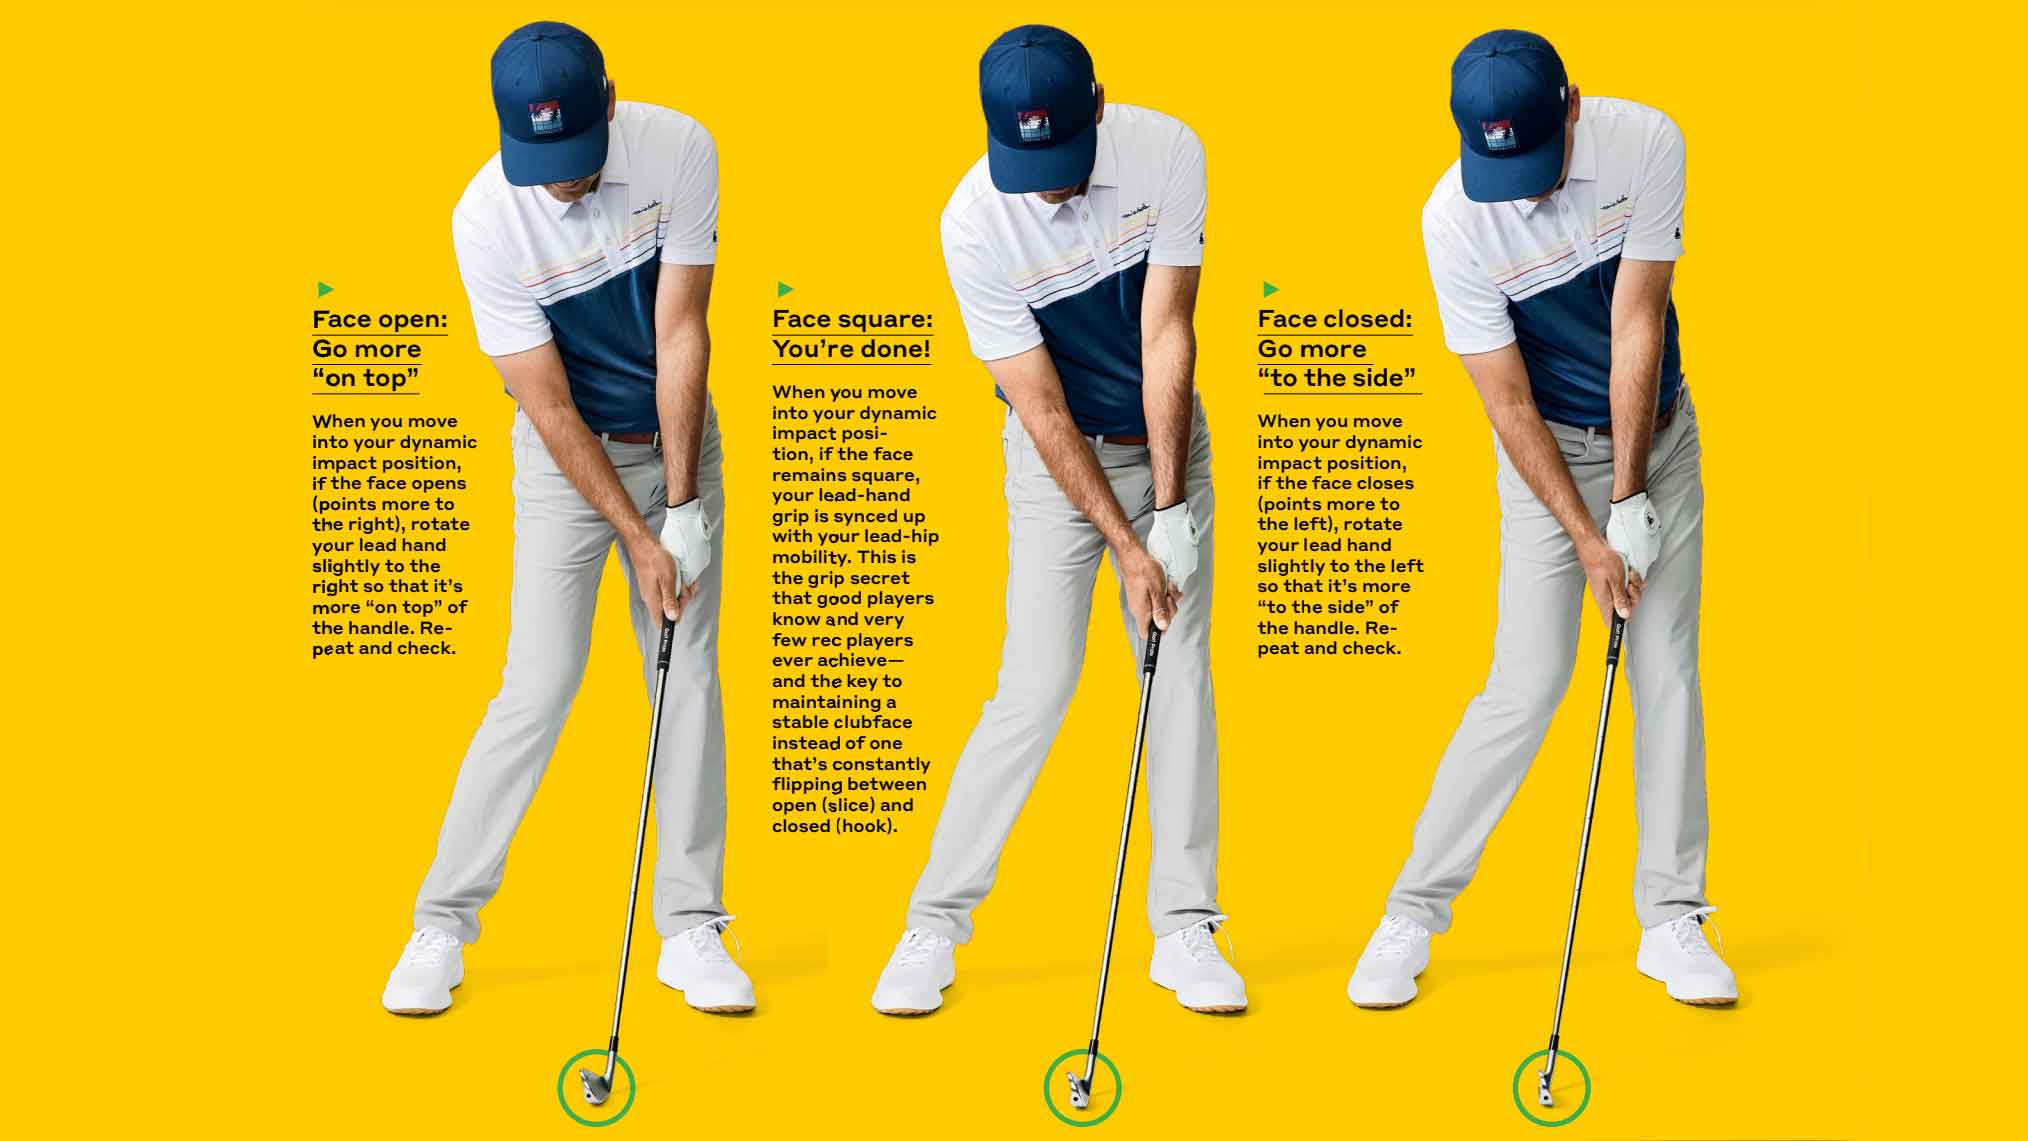
Stephen Denton
3. Slip on your trail hand
I asked you to add your trail hand to your grip to fine-tune your lead-hand hold on the previous page. Now, let’s take the trailhand addition seriously. Using your new leadhand position, hold the club out in front of you at a 45-degree angle. Slip on your trail hand, being careful to place the grip through the base of your fingers (so they can wrap around the handle easily), not through your palm. Fellow Top 100 Teacher Michael Jacobs uses a great analogy: Hold the handle in your trail hand like you’d hold a suitcase. Perfect.
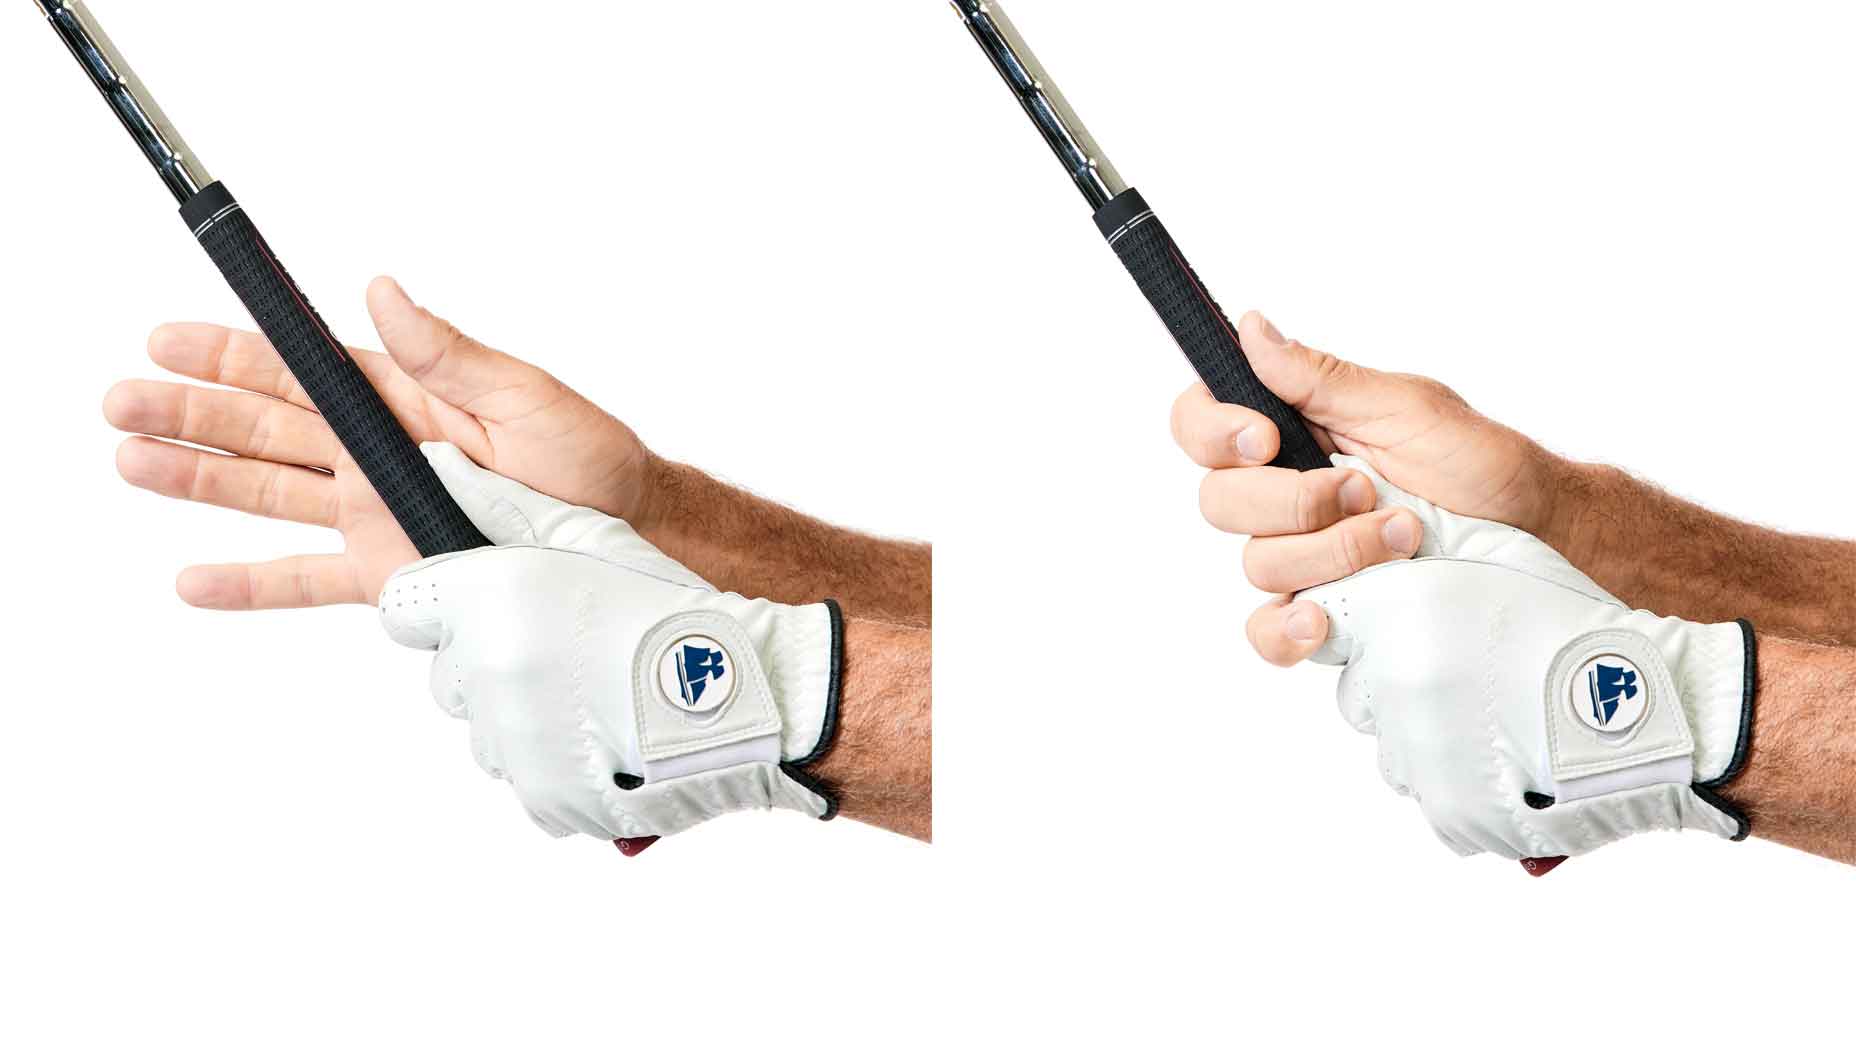
Stephen Denton
4. Do the cast drill
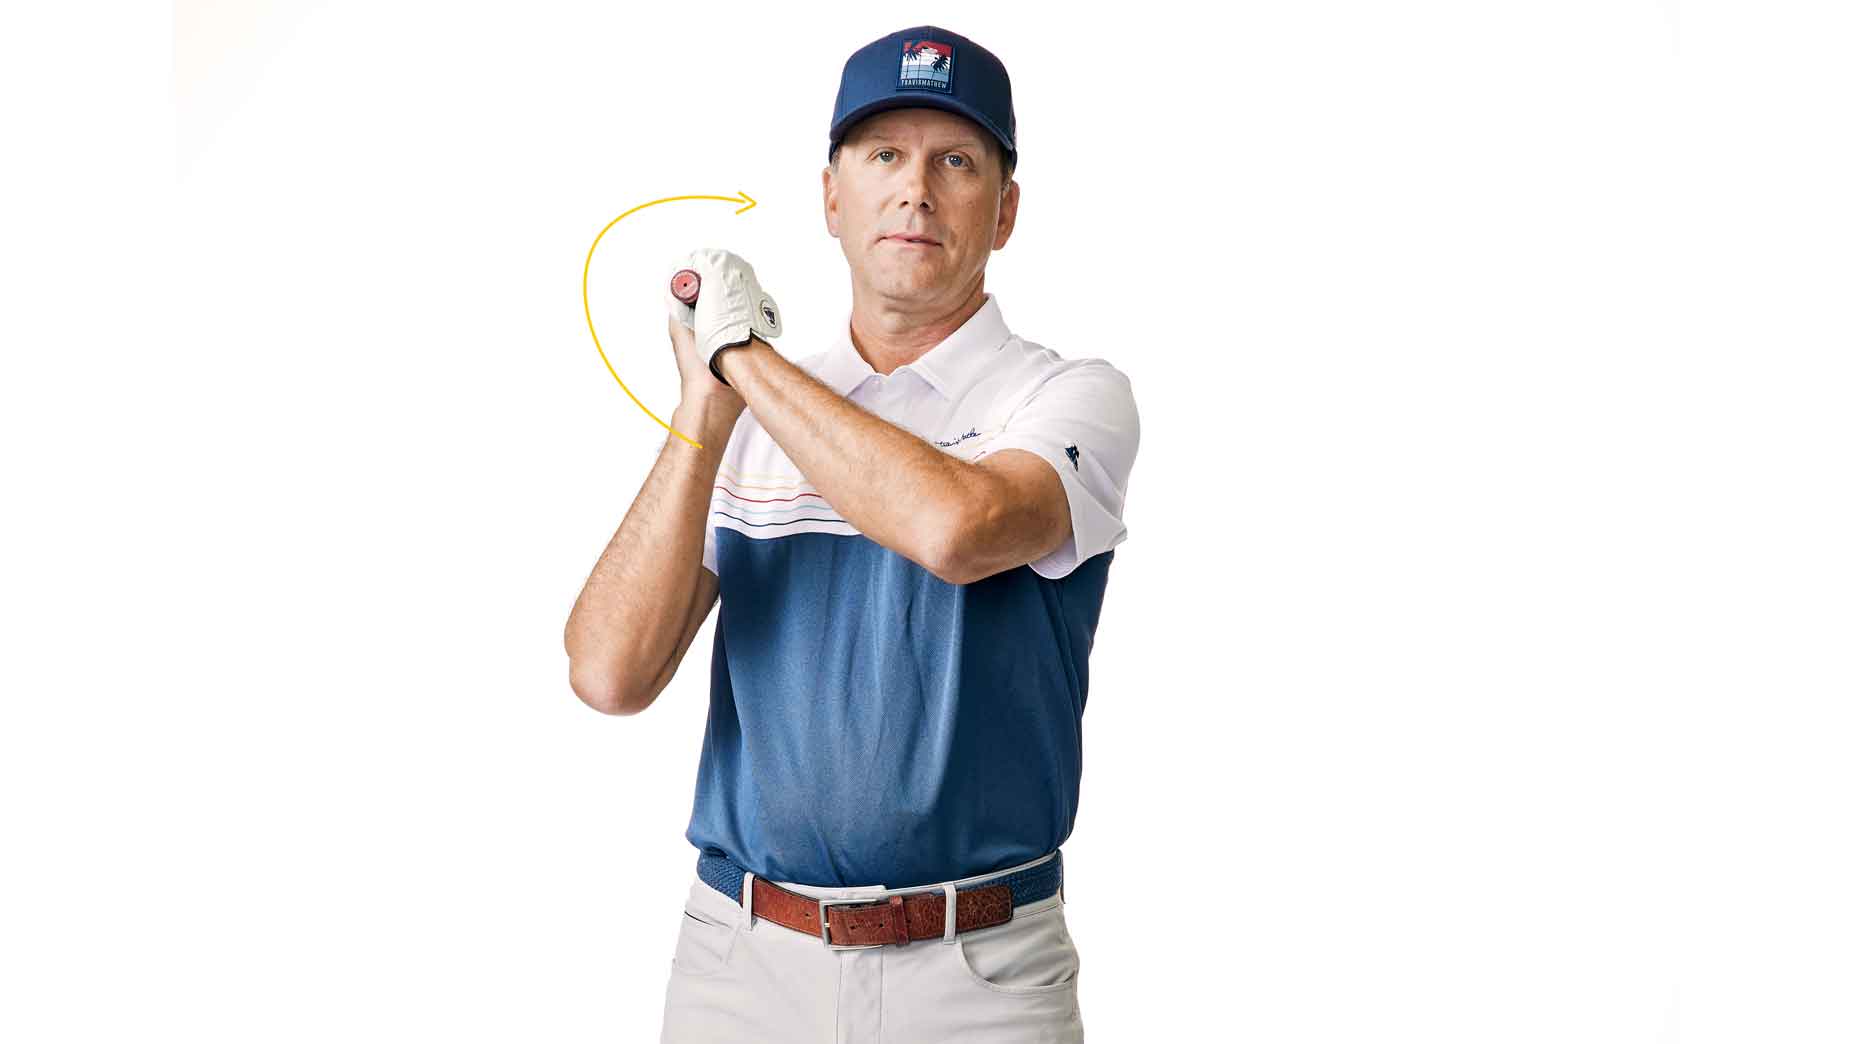
With both hands on the handle, motion the club over your trail shoulder (right), then throw it forward as if casting a fishing line. This simple test replicates the trailarm extension that happens in all downswings. Top 100 HOF-er Mike Adams has done great work on this nearautomatic extension and how important it is for your trail-hand grip to accommodate it (just like the need for your lead hand to match your hip mobility). Do the cast test, then check your results (see below).
Stephen Denton
5. Tweak your trail hand
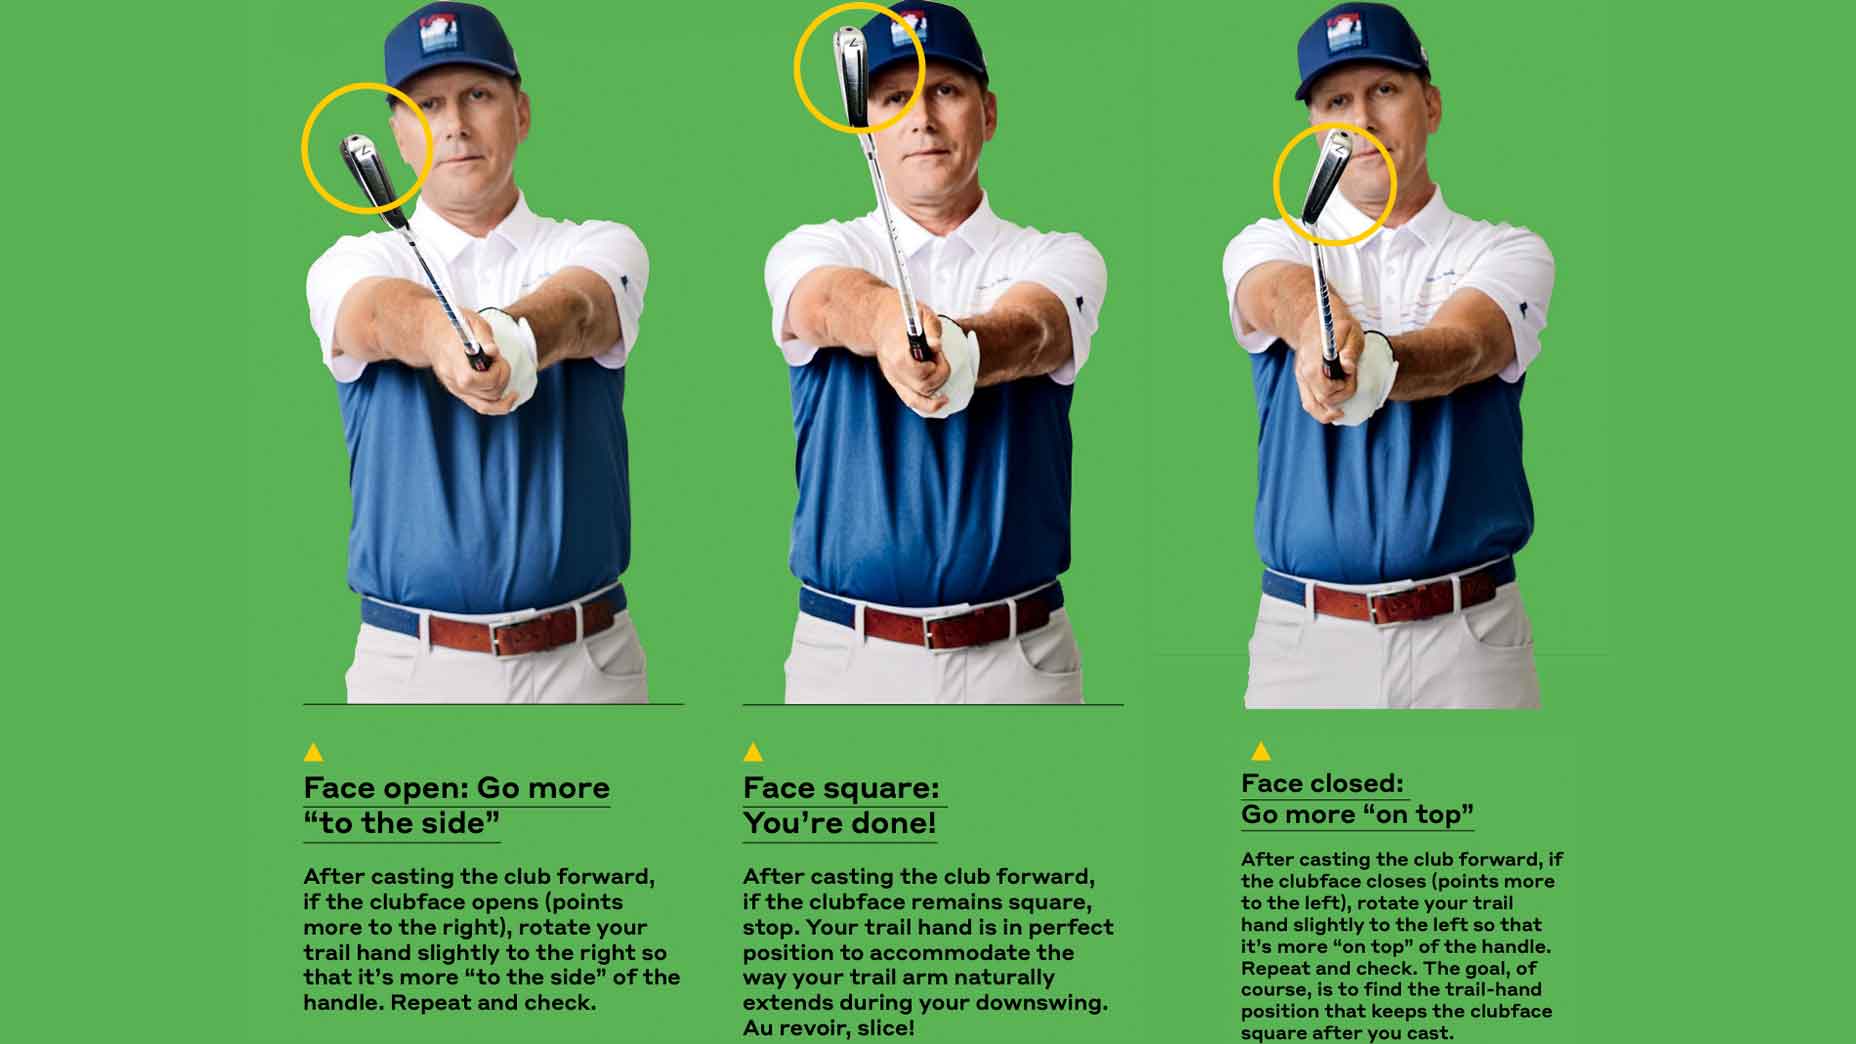
Even the slightest mismatch between your trailhand hold and the manner in which your trail arm extends during your downswing will limit your potential. (If you tend to slice, it’s likely that this grip and extension mismatch is the culprit.) Once you cast the club in the drill, hold and check the position of the clubface. Adjust using the guides below.
Stephen Denton
5. Add the finishing touch
It’s unlikely your Vs will both point toward your trail shoulder once you find your natural hold. Not only is this okay, it’s what you need to swing without restriction while keeping hooks and slices at bay. One last thing: Check for any gaps between your fingers. You want zero. This increases the surface area over which you can push and pull on the handle, giving you greater control of the clubface. You wouldn’t bench press with your fingers apart, right? Your hold is now perfect. Let ’er rip!
Joe Plecker is a GOLF Top 100 Teacher and is the director of instruction at The Landings Club in Savannah, Ga.


